On a recent episode of Security Now, Steve Gibson and Leo Laporte revisited a very popular anonymizing technology called TOR. This sparked my interest and I had to learn some of the ins-and-outs.
So what is TOR?
TOR is an acronym for 'The Onion Router' which is actually a very descriptive name given how the technology works. At a high level, TOR will route your network traffic through three nodes before reaching the destination via the last node (called an exit node). At each node, the request is encrypted using the public key of the next node in the chain, thereby creating a layer of encryption at each level and fulfilling the onion metaphor. The same process happens in reverse with the response.
Originally developed by the US navy for secure communication it has been adapted in to an open source project for the public. The reasons for requiring anonymous internet access may not be immediately apparent to some but they can be of paramount importance for others. From protecting your web browsing on a public wifi network to sending email from countries whose governments spy on their citizens and suppress free speech.
One of the things that piqued my interest, which did not exist when I first encountered TOR a few years ago, is the advent of 'Hidden Services'. I wanted to see how this system worked and just how easy it was to run my own hidden service.
Always looking to learn new things I actually ended up killing multiple birds with one stone in that I got the chance to play with multiple technologies I'd had my eye on for while. Lets get started.
Initial Setup
Before we can set up a hidden service on TOR, we need to actually have a service that we want to hide. I decided to check out a popular Python micro web framework called Flask.
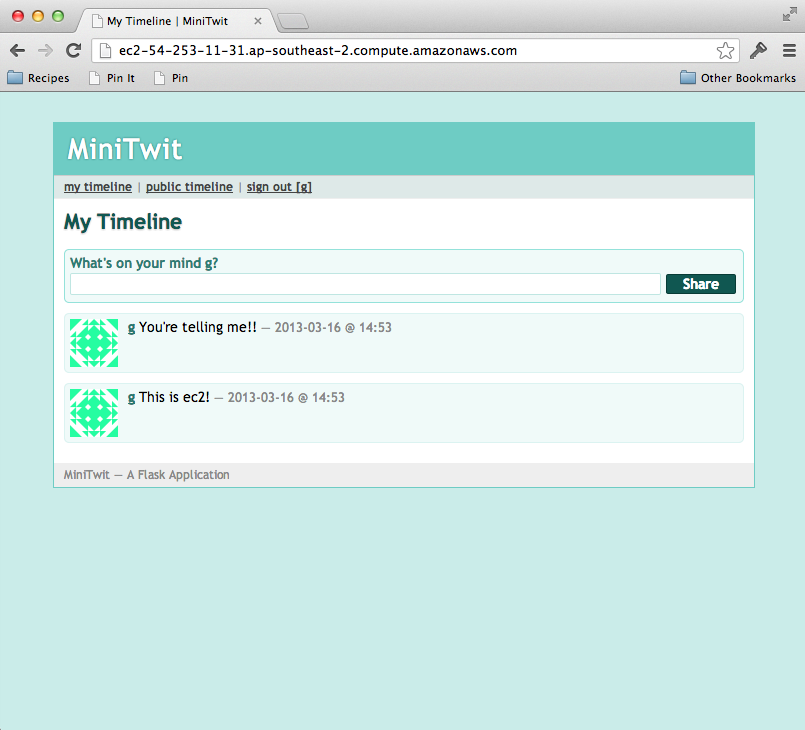
The Flask Git repository has a few example applications you can toy with, so I chose to get the example twitter clone 'minitwit' app running. To do this I spun up an Ubuntu server using Amazon's Elastic Could Compute service otherwise known as EC2. EC2 is just one service in Amazon's suite of cloud offerings and allows users to create servers and scale them at will. It is used by many top tier tech companies including Netflix and Instagram.
Not only is this technology used to power the titans of the tech industry but it's also great for smaller projects and prototyping. Amazon has a free tier which provides 750 hours of server uptime every month for one year and this will be the tier that i'll use for the project.
Amazon has made it very simple to create a new instance, you do this on the AWS console page by following the links to the EC2 page and hitting 'Launch Instance'. Once that's done make sure you configure your security group to allow TCP traffic on post 22 for SSH access and port 80 for our web server. Just hit the 'Security Groups' link in the left column, click on the 'Security Group' that your instance is using, hit the 'Inbound' tab and apply the rules as per the screen shot below.

The Service
Next up, lets get our Twitter clone set up. If you wish to follow my guide directly then read this section otherwise if you already have a configured server and web-app then you can skip this section and move on to the TOR configuration section.
This will install the great python package manager pip:
> sudo apt-get install python-pip
Next install our required python packages:
> sudo pip install Flask
Now we'll get our app on the server. (I forked the Flask Git repository)
> mkdir ~/dev
> cd ~/dev
> git clone https://github.com/abarax/flask.git
And start it up
> cd flask/examples/minitwit
> python minitwit.py &
We should now have a twitter clone web application running on port 5000
Web Server Config
Out next step is to set up a web server on our EC2 instance. I will be using Apache 2 but you can use any flavour you like. Adding a web server in front of our python application gives us more flexibility in how users will access the service.
First, lets install the required applications:
> sudo apt-get install apache2 libapache2-mod-wsgi
Now we will create our WSGI config file for apache to talk to our Flask app. To do this, create a file in our minitwit directory called minitwit.py and add the following text:
import sys
sys.path.insert(0, '/home/ubuntu/dev/flask/examples/minitwit')

from minitwit import app as application
Next we need to configure apache. So create a new site file, lets call ours minitwit.com
> cd /etc/apache2/sites-available
> touch minitwit.com
Inside that file we are going to create our VirtualHost like so:
<VirtualHost *:80>
     WSGIDaemonProcess app
 WSGIScriptAlias / /home/ubuntu/dev/flask/examples/minitwit/minitwit.wsgi

   <Directory /home/ubuntu/dev/flask/examples/minitwit>
        WSGIProcessGroup app
    WSGIApplicationGroup %{GLOBAL}
    Order deny,allow
    Allow from all
   </Directory>
</VirtualHost>
Now just load up your config and restart apache:
> sudo a2dissite default
> sudo a2ensite minitwit.com
> sudo /etc/init.d/apache2 restart
Now we finally have our hosted Flask based twitter clone running. We should be able to navigate to it via Amazons provided DNS.
TOR Hidden Service
Now we get to the interesting part, lets install TOR and expose our twitter client as a hidden service on the TOR network.
TOR recommends using their own deb repository so the process is slightly more complicated in that you need to add their repo to your sources.list file.
> vi /etc/apt/sources.list
Add the following line:
deb http://deb.torproject.org/torproject.org <DISTRIBUTION> main
Where distribution is equal to your EC2 instances distro.
Next add the gpg keys for signing packages
> gpg --keyserver keys.gnupg.net --recv 886DDD89
> gpg --export A3C4F0F979CAA22CDBA8F512EE8CBC9E886DDD89 | sudo apt-key add -
finally run this command:
> sudo apt-get update
And install TOR:
> sudo apt-get install tor
Now that TOR is installed lets set up our hidden server. This is an amazingly simple task, just edit the torrc configuration file like so:
> sudo vi /etc/tor/torrc
Add the following to the hidden services location:
HiddenServiceDir /home/ubuntu/tor/hidden_service/
HiddenServicePort 80 127.0.0.1:80
Next, just restart TOR like so:
> sudo /etc/init.d/tor restart
Inside the /home/ubuntu/tor/hidden_service directory you will now find two files, a private_key file and a hostname file. Inside the private_key file is your services' private key and is vitally important to keep safe. Inside your host name file is the address which you can disseminate to users of your anonymous service, in my case it is mtq7eecokwr5kn22.onion.
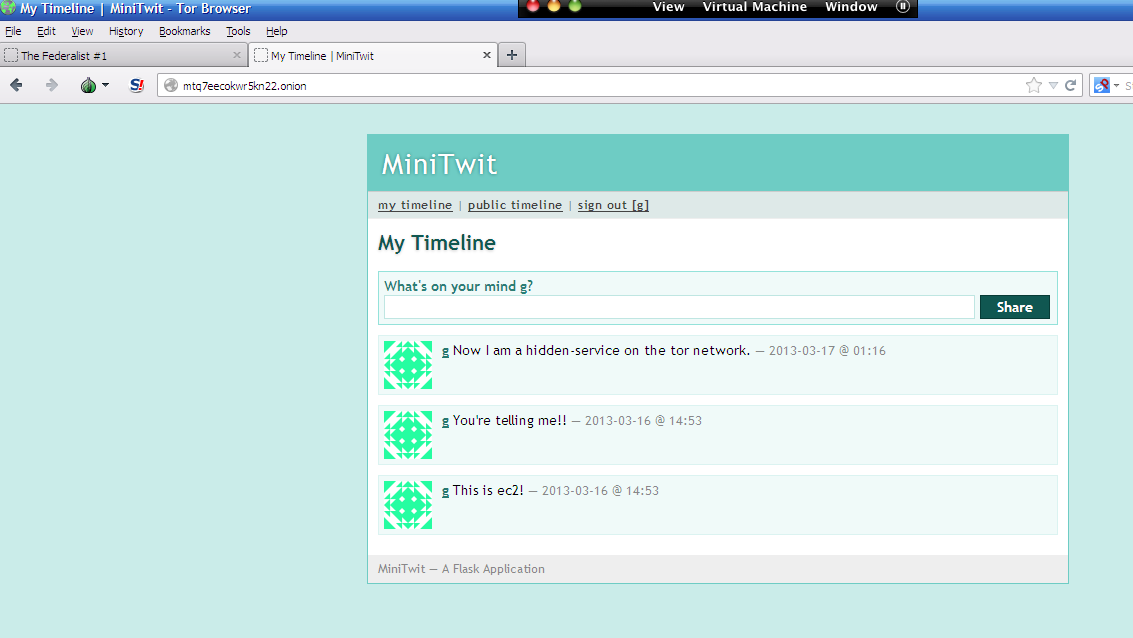
This address uniquely identifies our service and allows users to access the service on the TOR network just as a domain name would on the internet. Fire up your TOR client and follow my link above and you can create a completely anonymous minitwit account and post anonymous minitwits till your heart is content.
Well, that is all for now, I hope some of you found it interesting. Please feel free to give feedback.
Comments !